
ChatGPT App
The ChatGPT desktop app (which runs Codex under the hood) connects to your site’s MCP server through its built-in MCP settings. The recommended path is OAuth sign-in: no config files, no copied credentials. If you’d rather configure it by hand, the Application Password method still works.
Sign in with OAuth (recommended)
Section titled “Sign in with OAuth (recommended)”OAuth lets the ChatGPT app connect as your WordPress account through a one-time browser approval. No password is stored in the app.
Requirements: your site must be served over HTTPS and OAuth must be enabled in EMCP Tools → Connection (it turns on automatically on HTTPS sites). Only administrators can approve a connection.
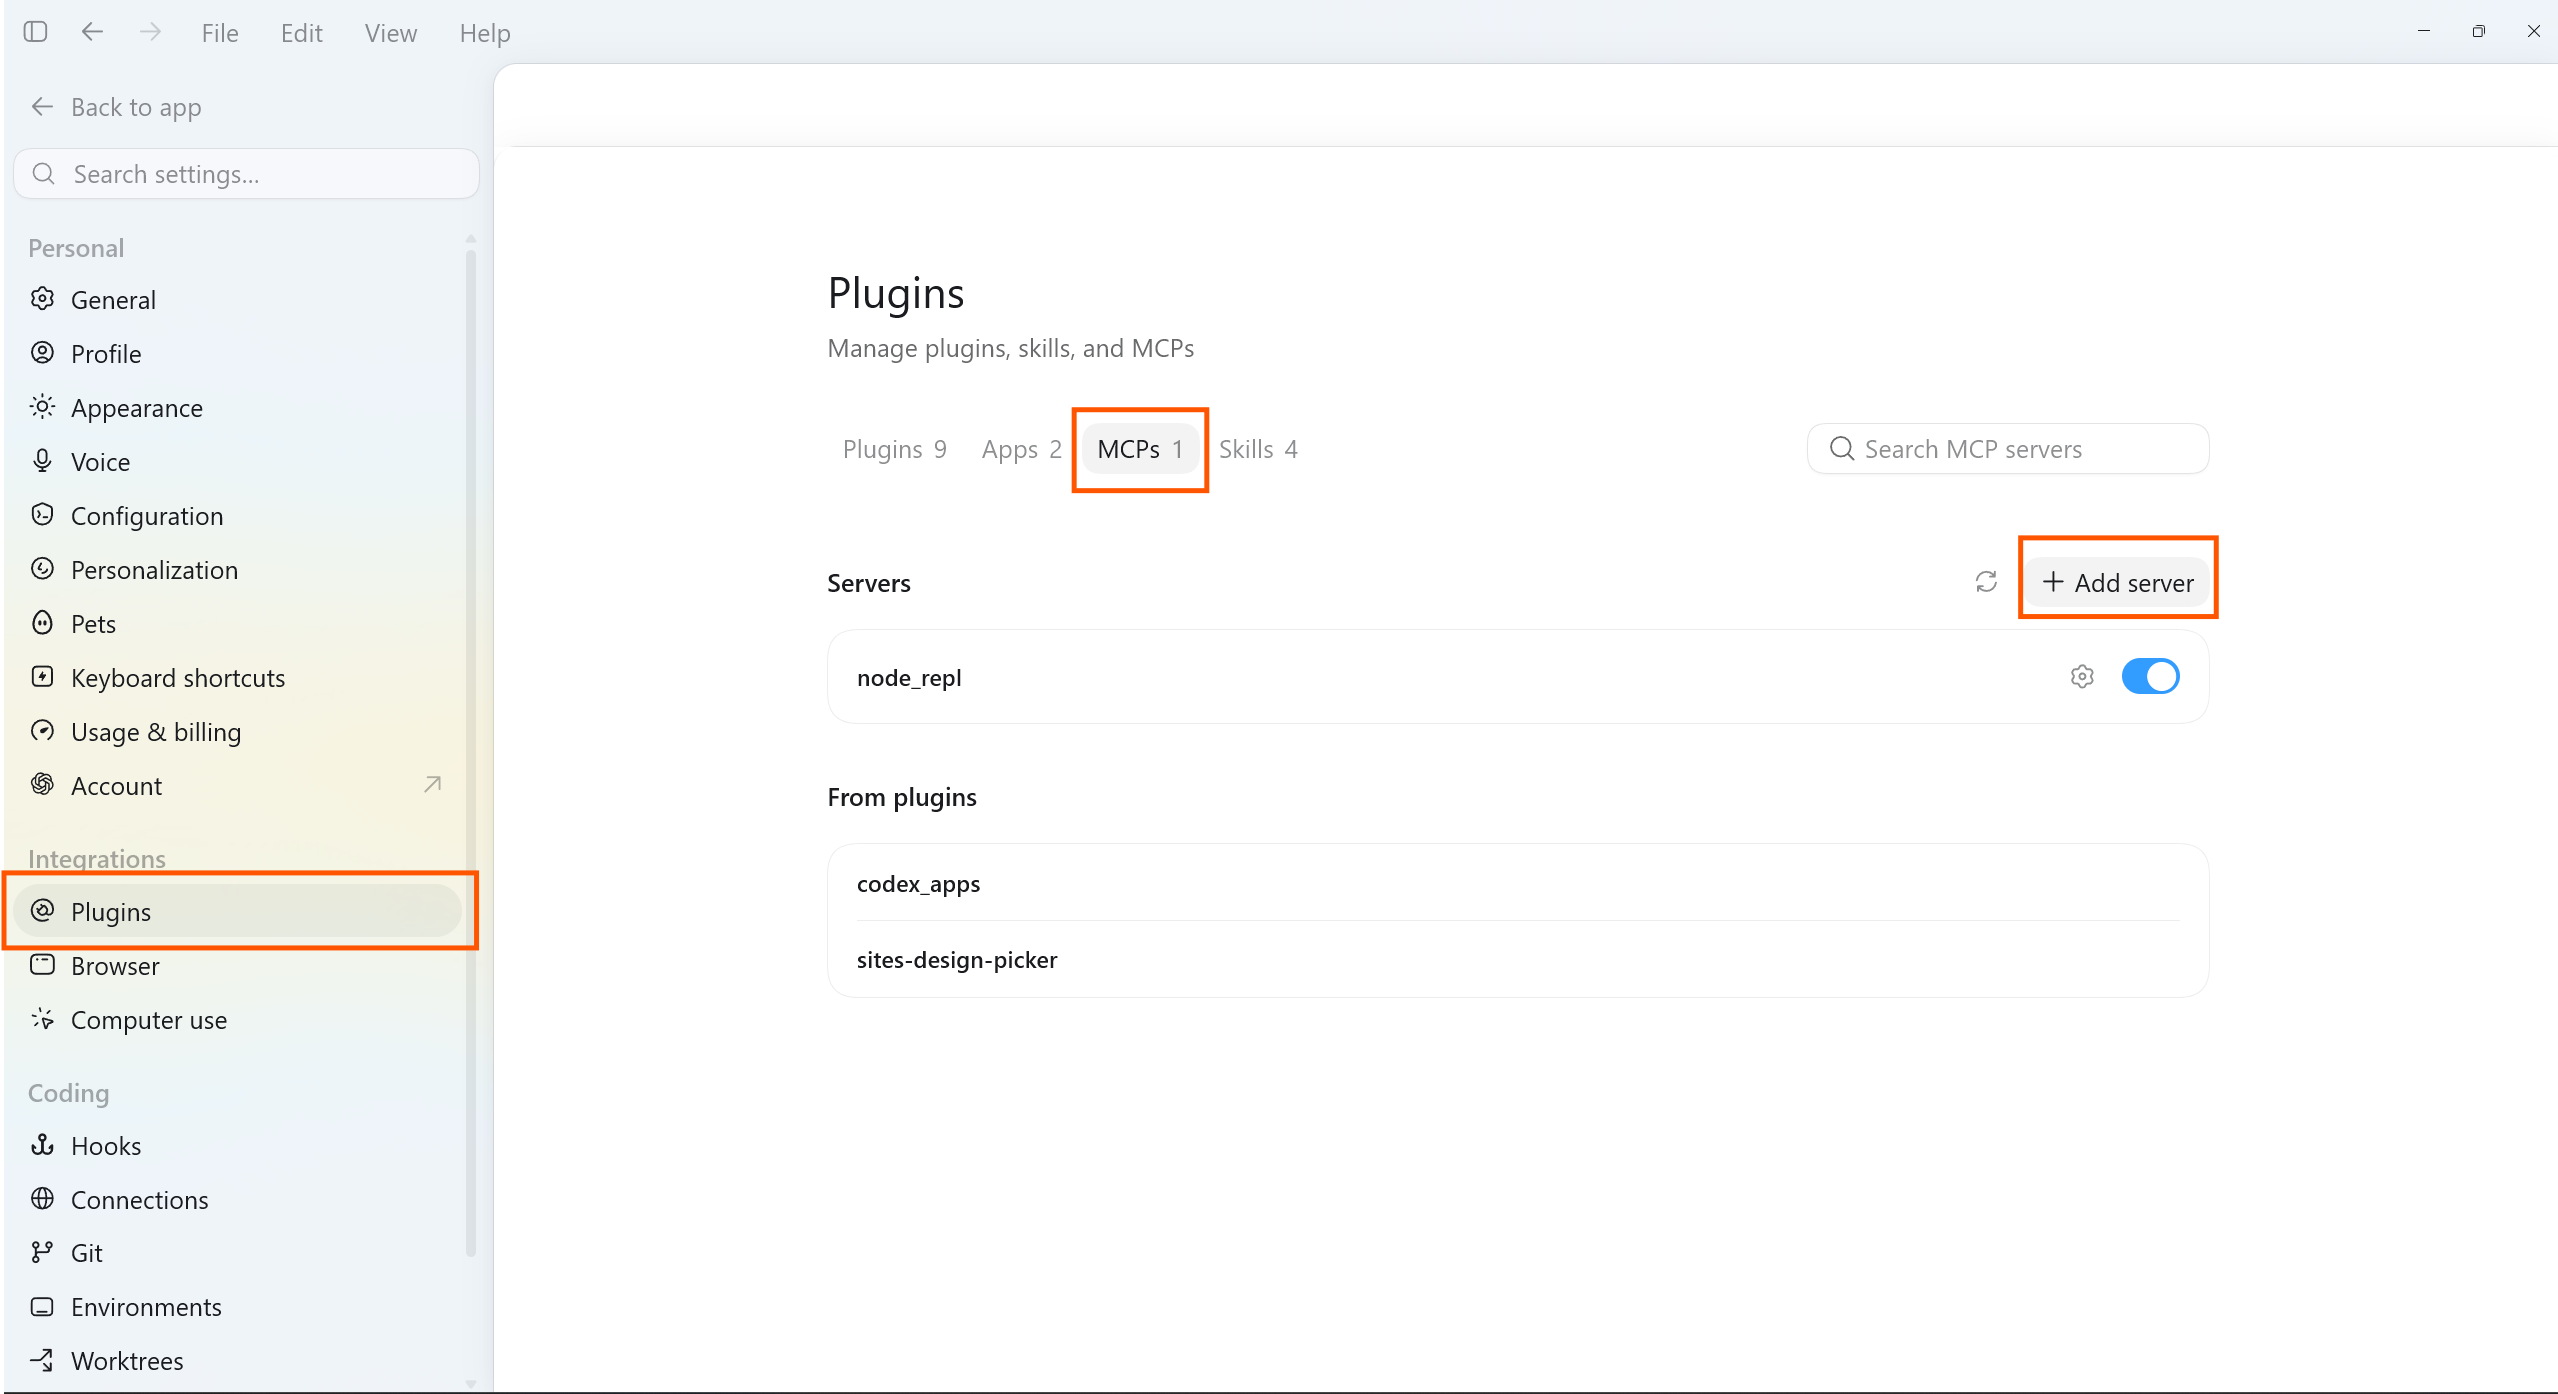
1. Open the MCP settings and add a server
Section titled “1. Open the MCP settings and add a server”In the ChatGPT app, go to File → Settings → Plugins, switch to the MCPs tab, and click Add server.
2. Choose Streamable HTTP and enter your URL
Section titled “2. Choose Streamable HTTP and enter your URL”Set Type to Streamable HTTP, give the server a name, and paste your MCP endpoint URL. Leave the bearer token and headers empty, OAuth supplies the auth. Click Save.
Your endpoint is shown in EMCP Tools → Connection and looks like:
https://your-site.com/wp-json/mcp/emcp-tools-server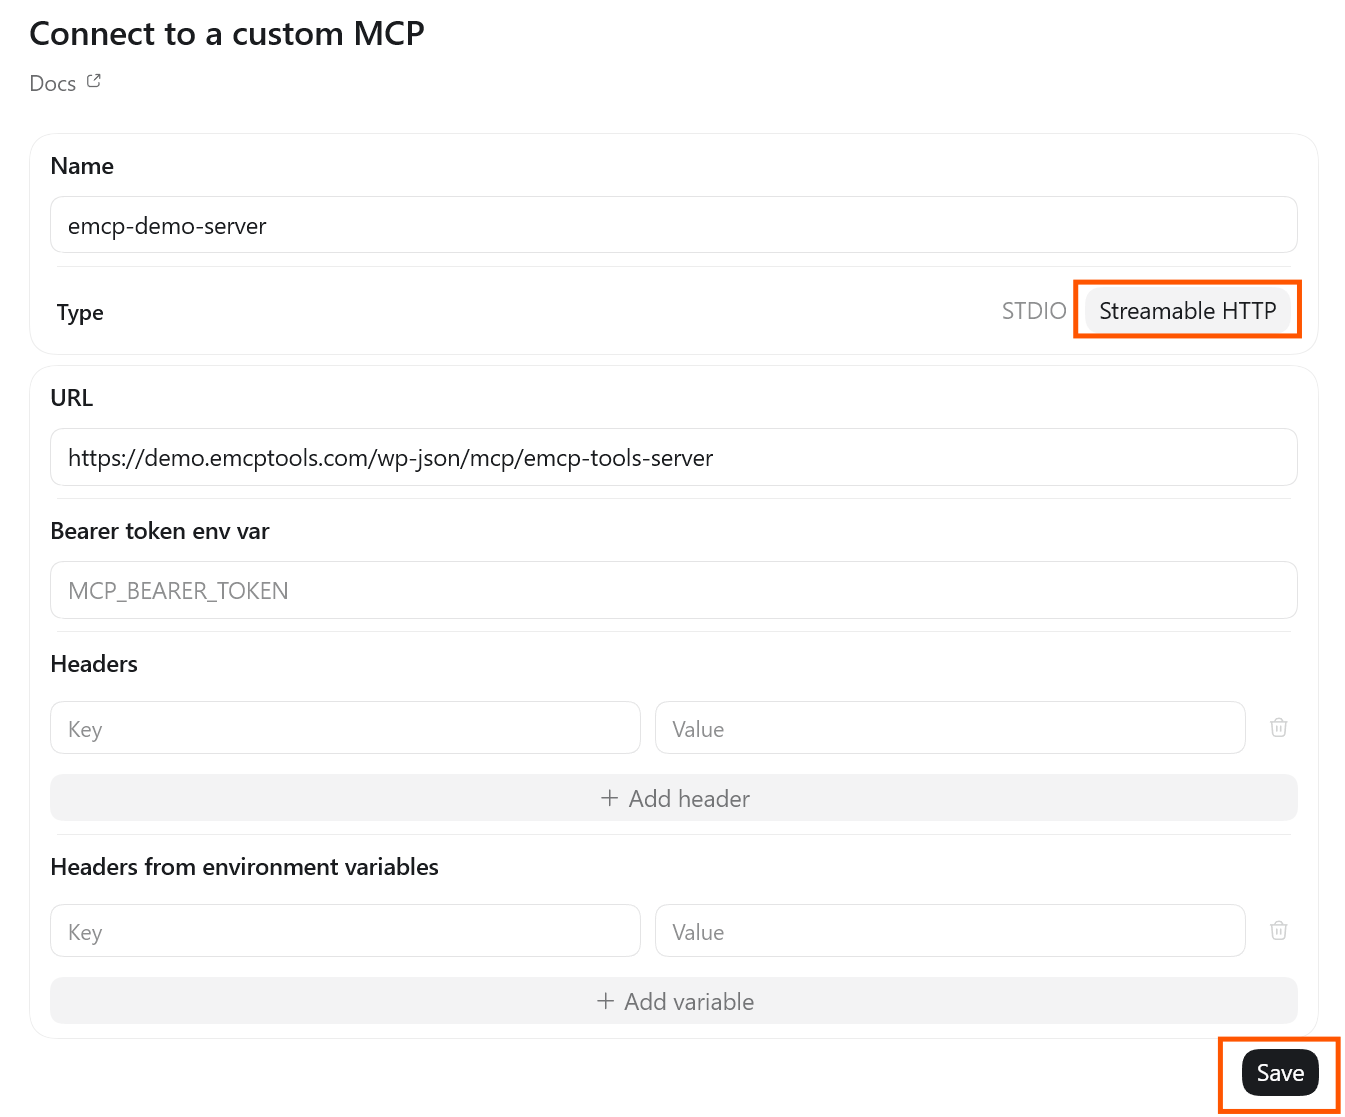
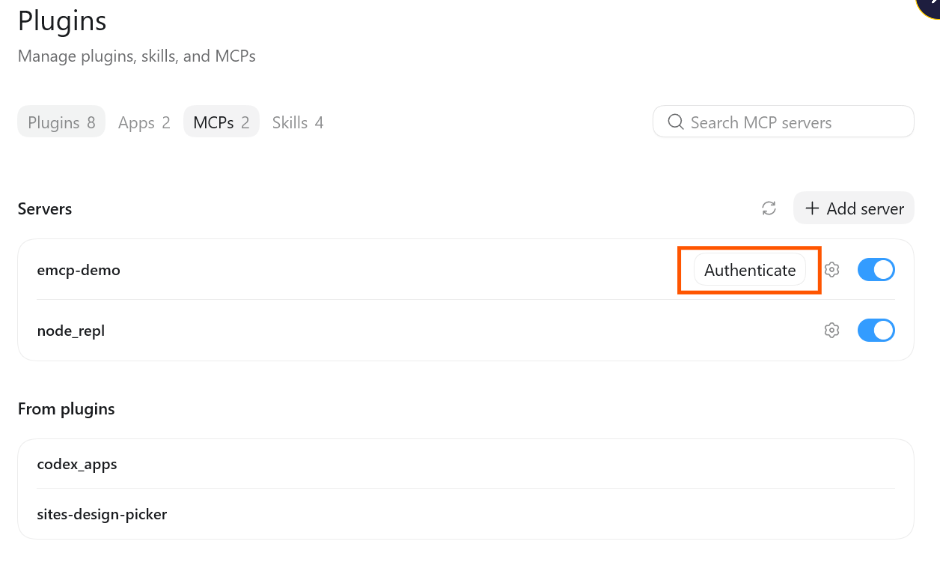
3. Click Authenticate
Section titled “3. Click Authenticate”After saving, an Authenticate button appears on the server’s row. Click it to start the sign-in flow.
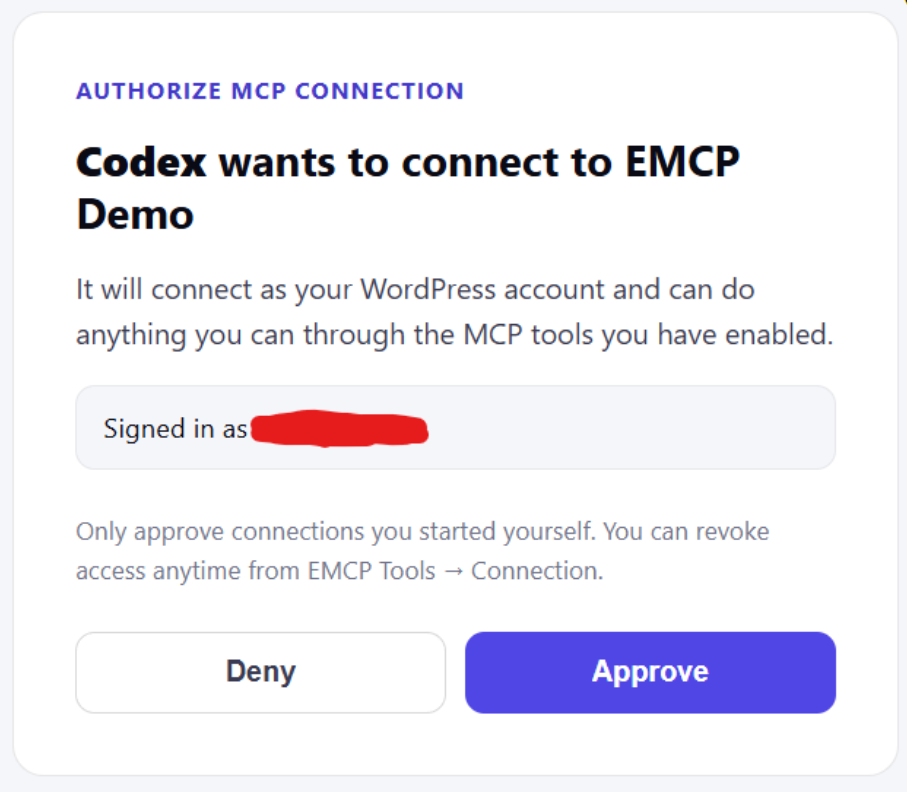
4. Approve the connection
Section titled “4. Approve the connection”A consent screen opens in your browser. Confirm you’re signed in as the right WordPress user and click Approve. The app connects as your account and can use any MCP tools you’ve enabled.
5. Done
Section titled “5. Done”The server now shows Authenticated (OAuth) and Enabled. You can start chatting with your site.
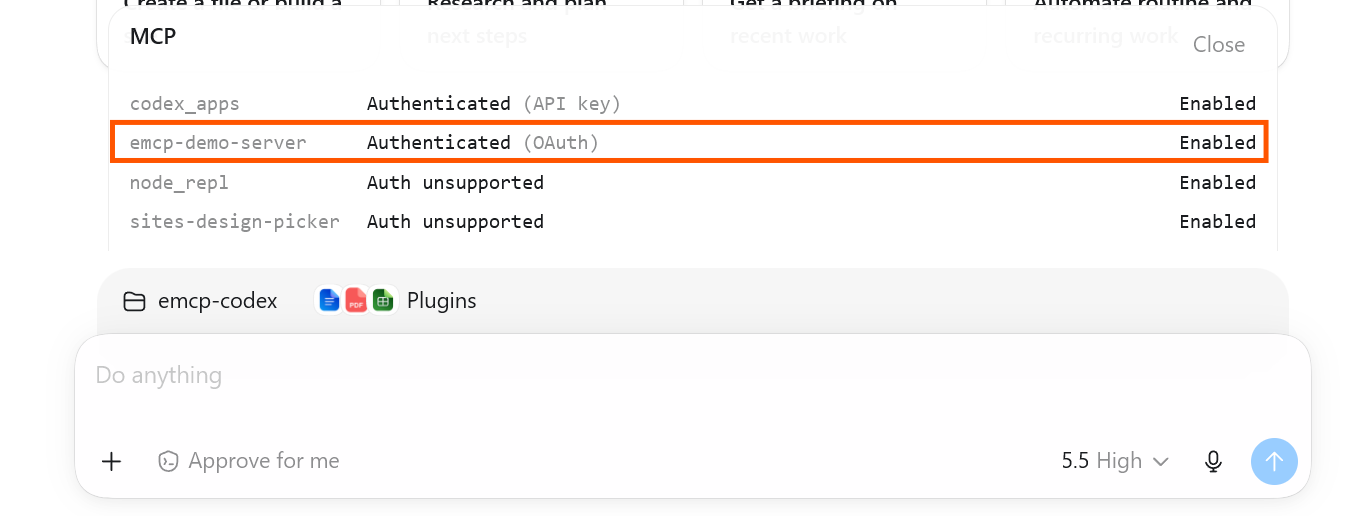
You can revoke access any time from EMCP Tools → Connection → Connected apps.
Application Password (manual)
Section titled “Application Password (manual)”If OAuth isn’t available (for example on an HTTP-only site), add the server to ~/.codex/config.toml (macOS/Linux) or %USERPROFILE%\.codex\config.toml (Windows):
[mcp_servers.emcp-tools]url = "https://your-site.com/wp-json/mcp/emcp-tools-server"
[mcp_servers.emcp-tools.http_headers]"Authorization" = "Basic BASE64_ENCODED_CREDENTIALS"
Generate the base64 credentials from your WordPress username and an Application Password:
echo -n "admin:xxxx xxxx xxxx xxxx xxxx xxxx" | base64(Application passwords come from WordPress admin → Users → Profile → Application Passwords.) The plugin’s EMCP Tools → Connection admin screen has a one-click config generator that fills this in for you.
Verify
Section titled “Verify”Open File → Settings → Plugins → MCPs. The server should be listed and Enabled: Authenticated (OAuth) if you signed in, or connected via your header if you used an Application Password.
Common errors:
401 Unauthorized(Application Password): the password is wrong or the base64 encoding is missing/malformed.- OAuth stuck / no browser prompt: confirm the site is HTTPS and OAuth is enabled in EMCP Tools → Connection. Some hosts block
/.well-known/requests, if so, use the Application Password method instead. Server returned 0 tools: the connection worked but no tools registered. See No tools appearing.